8 Interior Designers Share How The Kitchen Splashback Elevates A Space
Don’t underestimate the impact of a kitchen splashback. While it might be a relatively small surface area, it can dramatically change the mood of your space. Whether you go for bold and patterned tiles or soft and textural marble, it’s one of the most rewarding updates you can make, both aesthetically and practically.
So, we enlisted the expert guidance of eight top interior designers to find out how to make the most of this small but mighty design detail, from DIY tips (spoiler alert: proceed with caution) to tips on what will last, and ideas on how to tie it into the rest of the room. Scroll to find out more…
1. How easy is it to change a kitchen splashback?
“It’s one of the simplest and most effective ways to refresh a kitchen without starting from scratch. Because a splashback is a contained area, you can make quite a dramatic change with relatively little disruption. Whether you’re swapping tiles, adding glass, or introducing something more sculptural like stone or metal, it’s a great opportunity to inject personality and texture without a full renovation.”
– Franky Rousell, CEO & Founder of Jolie
It’s one of the simplest and most effective ways to refresh a kitchen without starting from scratch.
“It’s actually a very straightforward update, particularly if you have good contractors or joiners on board. Changing a splashback doesn’t require reconfiguring the whole kitchen, but it can completely alter how the space feels.”
– Carina Raymond, Interior Designer & Founder of Studio Raymond
“This depends on the type of worktop and if anything needs to be removed. If you are just adding a splashback, using tiles is straightforward and can be added on, meeting the current worktop and will be sealed at the join. If you want to use a solid piece of marble or glass, this will depend on how it can be slotted into place, especially if there is a downstand to any cupboards above.”
– Melissa Hutley, Interior Designer & Co-Founder of Hutley&Humm
2. Can you DIY, or is it best to budget for a professional?
“It depends on the material. If you’re using tiles or simple panels, a confident DIY approach can work. But for anything involving natural stone, mirrored glass, or bespoke finishes, it’s best left to professionals. Precision makes a big difference, as misaligned joints or uneven grouting can really detract from the overall effect.”
– Jacu Strauss, Design & Creative Director of Lore Group
“Always a professional. Natural stone, in particular, demands precision, and it needs to be cut and fitted perfectly to look its best. In a kitchen, the finish really is everything.”
– Carina Raymond
“Cutting and especially mitring tiles is a skilled job and requires the right equipment. If you’re a confident DIY’er, go for it, but always get extra tiles in case things go wrong.”
– Laura Stephens, Interior Designer & Founder of Laura Stephens Interior Design

3. Are there any cheaper or easier alternatives if you don’t have the budget for a professional job?
“Tongue-and-groove panelling is very DIY-friendly and relatively inexpensive, so it’s a great option for a quick weekend project. Tiling, on the other hand, especially with handmade or patterned tiles, really benefits from an installer. The precision of the finish makes a huge difference to the final look. It’s easy to source from most DIY stores or online, simple to install, and adds lovely warmth and texture to the space.”
– Sophie Pringle, Interior Designer & Founder of Pringle&Pringle

4. What materials do you recommend for durability?
“Hard stones like marble, quartz, or granite are ideal as they’re durable, heat-resistant, and easy to maintain. I also like using quartzite for a slightly different texture and tone. These materials perform well and bring a sense of permanence and quality to the kitchen.”
– Carina Raymond
Classic materials like stone, quartz, or porcelain tile are solid choices.
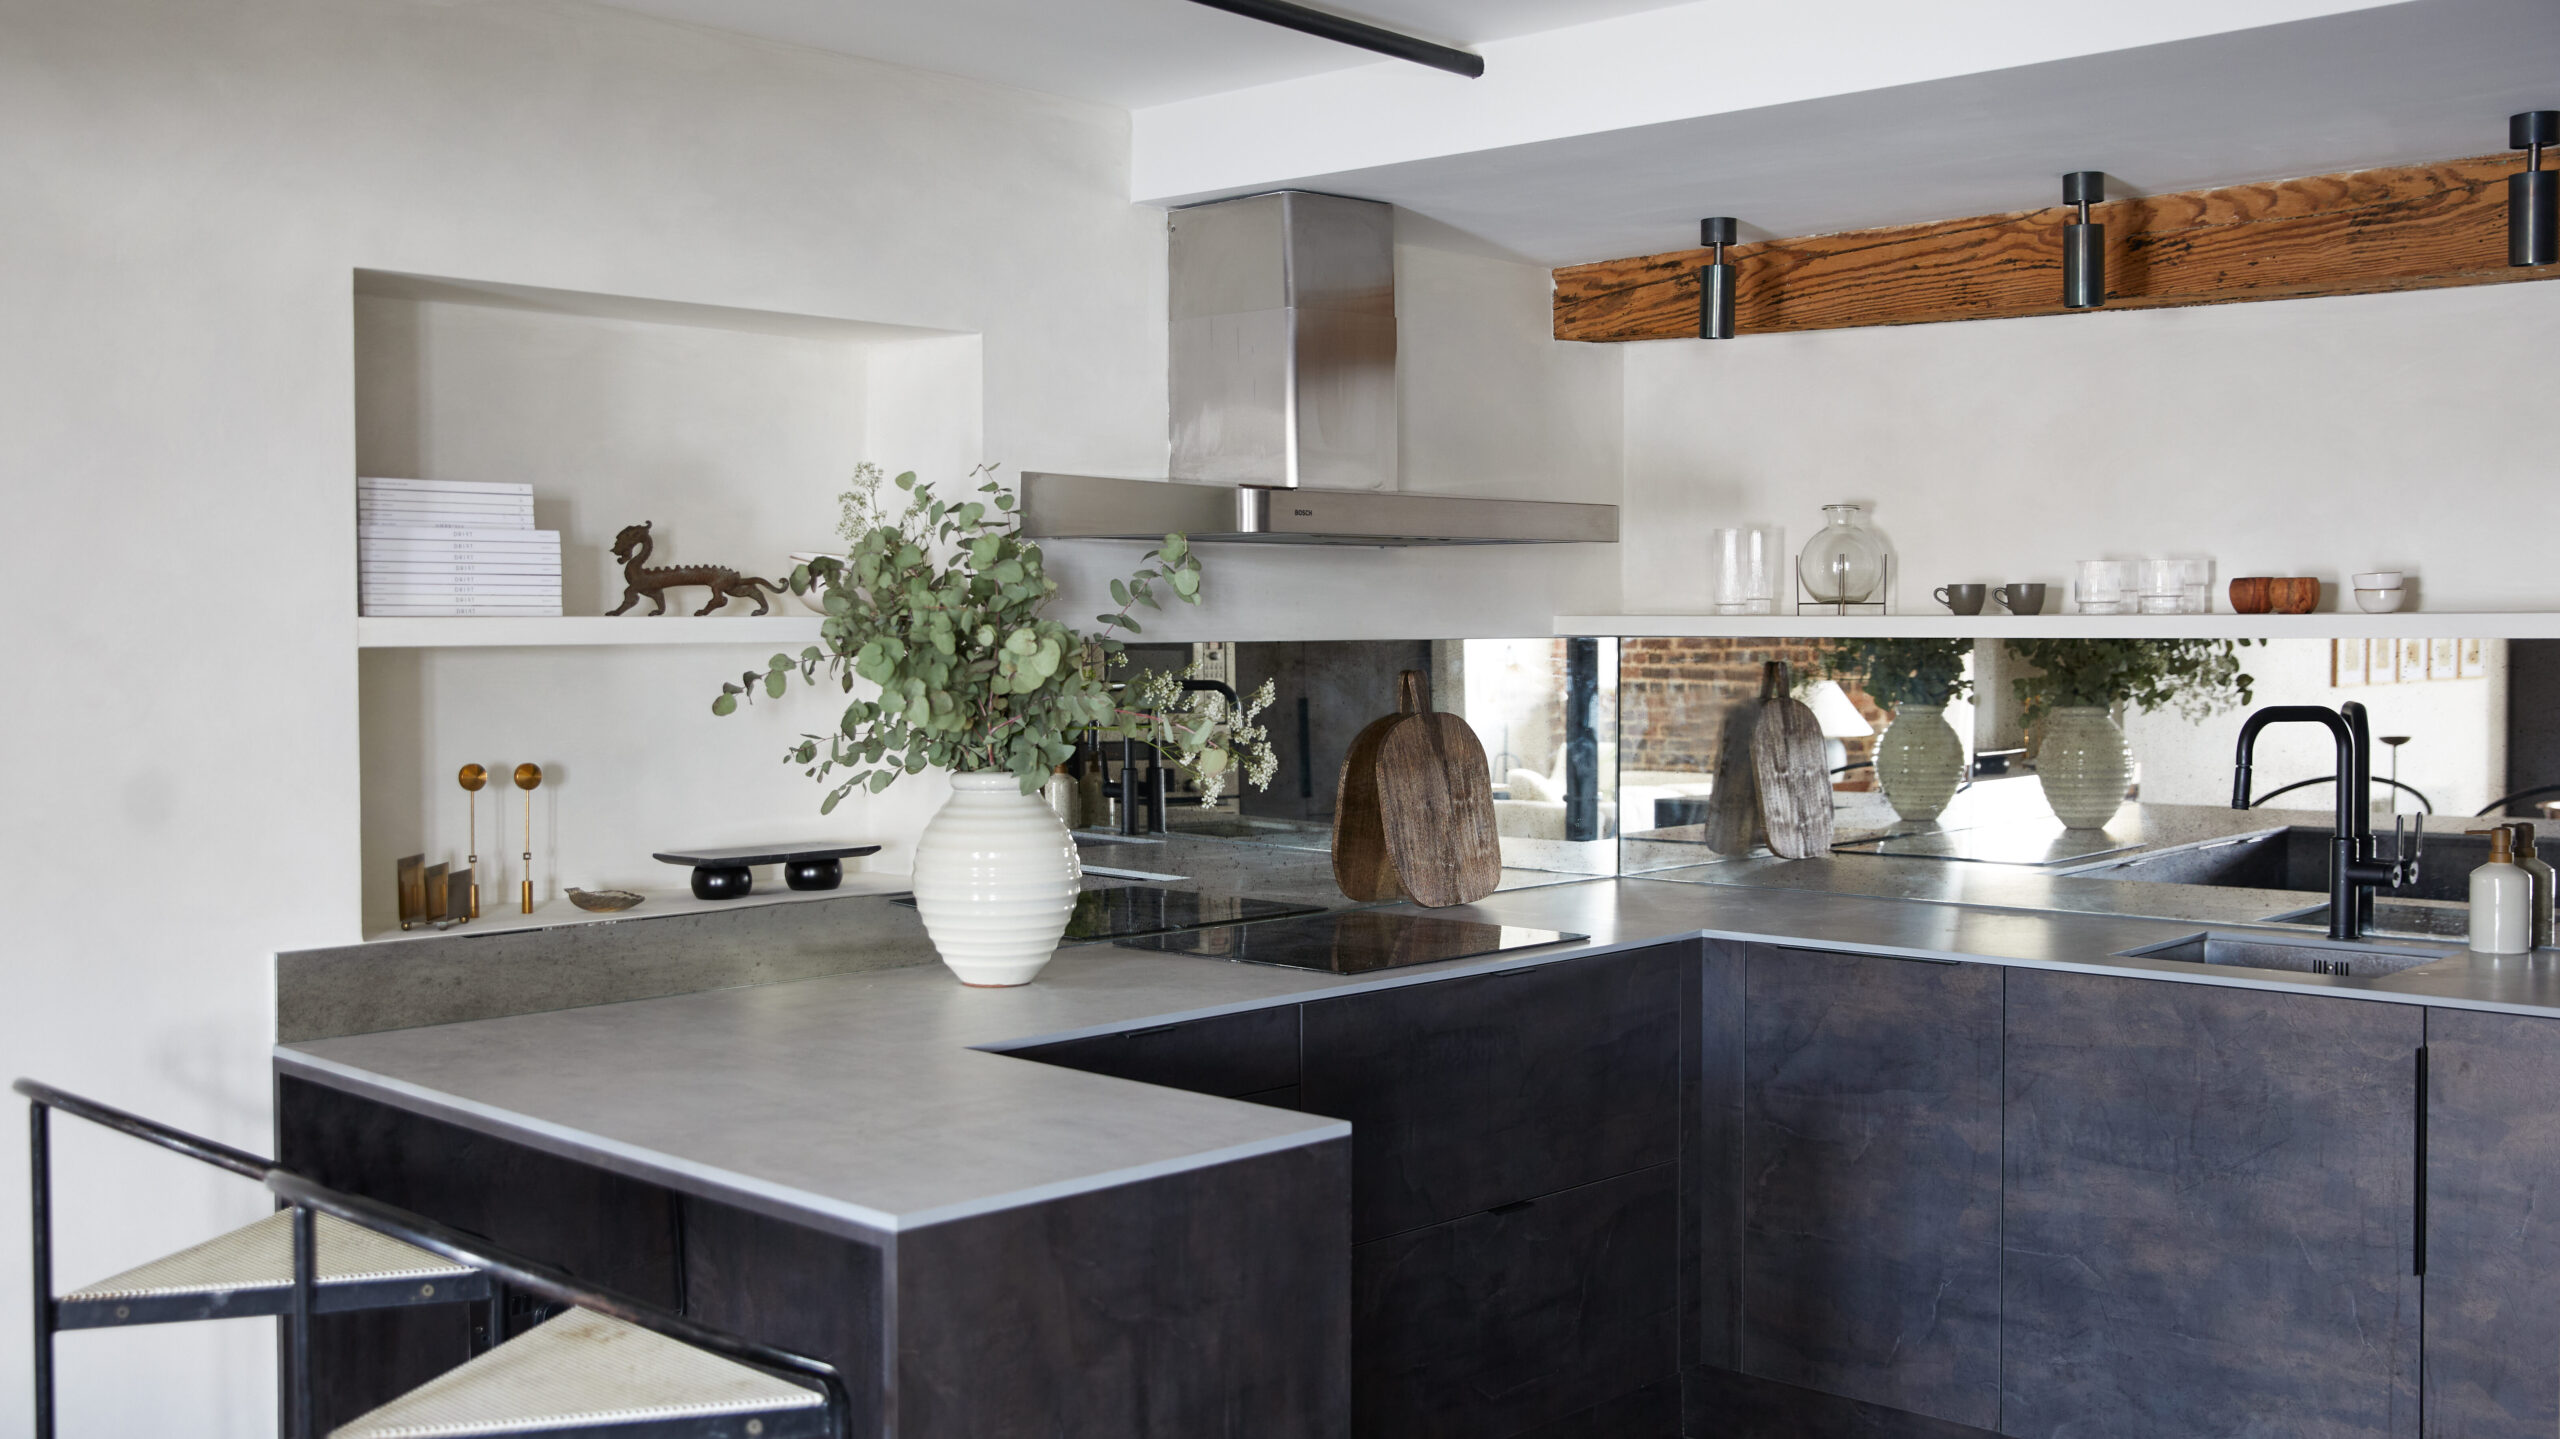
“For areas directly behind the stove, you absolutely need a material that is durable, non-porous, and easy to clean. Classic materials like stone, quartz, or porcelain tile are solid choices because they handle heat well and have minimal grout lines to maintain. However, you shouldn’t be afraid to use unexpected materials, like the mirrored splashback in this project. We chose this to reflect light and the brick texture from the opposite wall, opening up the space.”
– Annie Harrison, Interior Designer & Founder of Fare Inc.
“Tiles and quartz are both durable, heat-resistant, and easy to clean, which makes them ideal for behind a stove. In less high-impact areas, tongue-and-groove panelling is another lovely option. It’s simple to install, affordable, and adds warmth and character, and is particularly effective in country or cottage-style kitchens.”
– Sophie Pringle
“Tiles are a no-brainer; you can’t use panelling behind an oven unless it’s protected with glass. I also love an antiqued mirror finish to create warmth and reflection. “
– Laura Stephens
5. What are your tips on working with marble?
“If you’re installing marble with dramatic veining, it is incredibly important to factor in its resilience. Remember that stone is a porous material, and in this location it will be exposed to water, heat and chemicals, so it is imperative to ensure it is sealed to the highest quality. Maintaining it annually will ensure it avoids cracks, staining or etching.”
– Katharine Pooley
6. What trends are you seeing in kitchen splashbacks right now?
“Using tiles is becoming more popular, with a nod back to traditional French, Dutch and Italian kitchens – plain colours, the use of border patterns, interspersed designs, etc, the options are endless.”
– Melissa Hutley
“We’re seeing a shift towards materials that bring more texture and tactility into the kitchen. Glazed finishes that catch the light softly, recycled glass with a gentle shimmer, and natural stone or plaster that adds quiet depth. There’s a growing appreciation for surfaces that feel layered and responsive, ones that subtly change with light and touch. Continuing the worktop material up the wall is also still popular, creating a seamless, connected look.”
– Franky Rousell
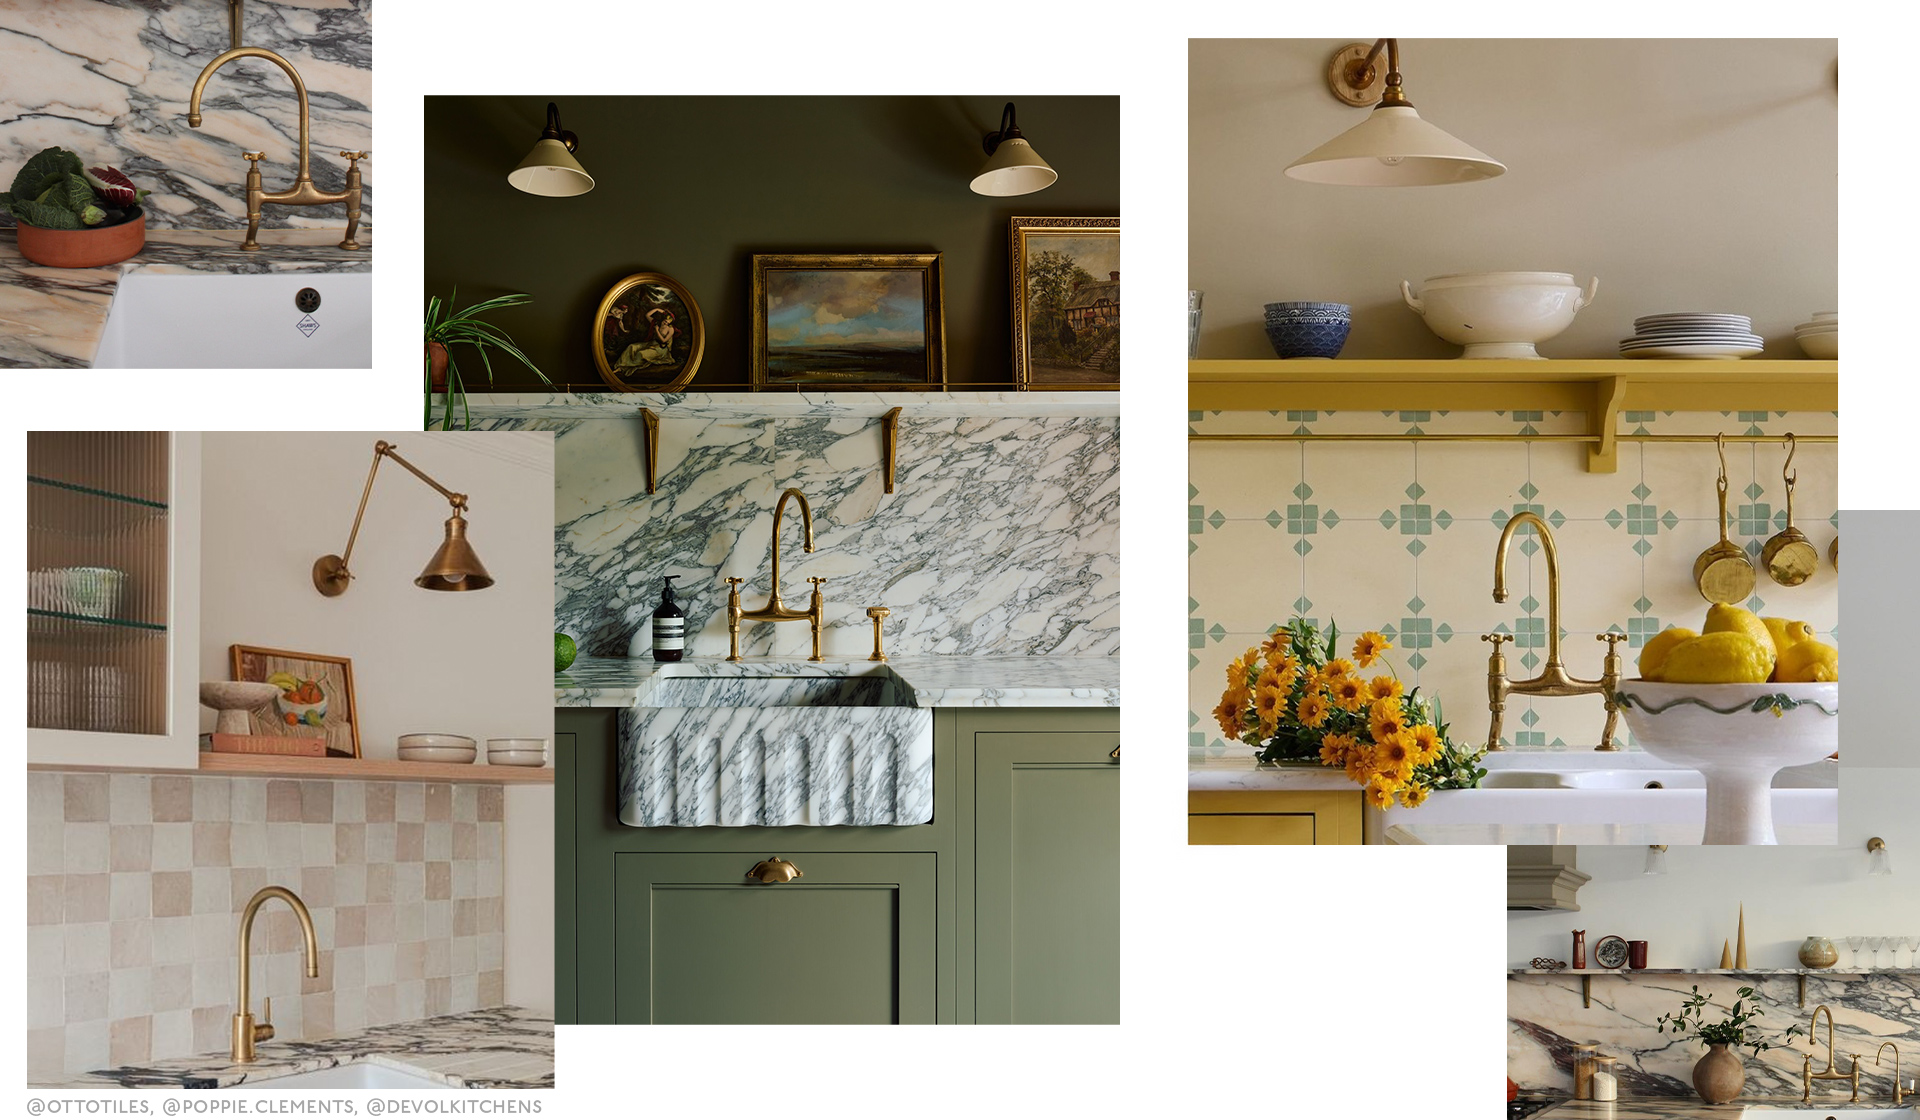
“We’re seeing a lot of beautiful hand-painted tiles coming through, particularly Italian-inspired designs. Balineum has an incredible range we’d love to use, and their tiles bring such charm, artistry, and individuality to a kitchen. We’re also noticing renewed interest in tactile finishes like zellige tiles, which add a handcrafted feel and subtle movement to a space.”
– Sophie Pringle
“There’s a definite move towards richly veined, expressive stones; marbles like Calacatta Viola and Statuario are having a moment. People are embracing natural materials that feel individual and characterful. These dramatic stones work beautifully with calmer, grounded cabinetry colours in earthy or neutral tones – the contrast creates balance and a sense of quiet luxury.”
– Carina Raymond
“I love cohesive design elements that combine beauty with functionality, and one trend that perfectly captures this is the waterfall splashback, where the surface material flows seamlessly beyond the cooking zone. It might continue up the wall, wrap around corners or even extend all the way to the ceiling, creating a sense of fluidity. I’m also drawn to the use of rich, bold tones and glossy finishes – deep emerald or navy tiles that bring a pop of colour, or materials like burnished copper and brushed bronze that develop a beautiful patina over time.”
– Katharine Pooley, Interior Designer

Pringle & Pringle Kensal kitchen
“We are seeing a resurgence in patterned tiles in backsplashes, which I love. Simple tongue and groove is also a great budget option that still works really well.”
– Laura Stephens
7. Should you make the splashback the focal point of the room?
“When you’re working with a striking marble or stone, it naturally becomes the focal point. I like to emphasise that by allowing the rest of the kitchen to act as a soft frame, using tonal colours on the cabinetry and even extending the same paint colour onto the walls. This creates a seamless, enveloping backdrop that allows the splashback to take centre stage without the space feeling busy or over-designed.”
– Carina Raymond
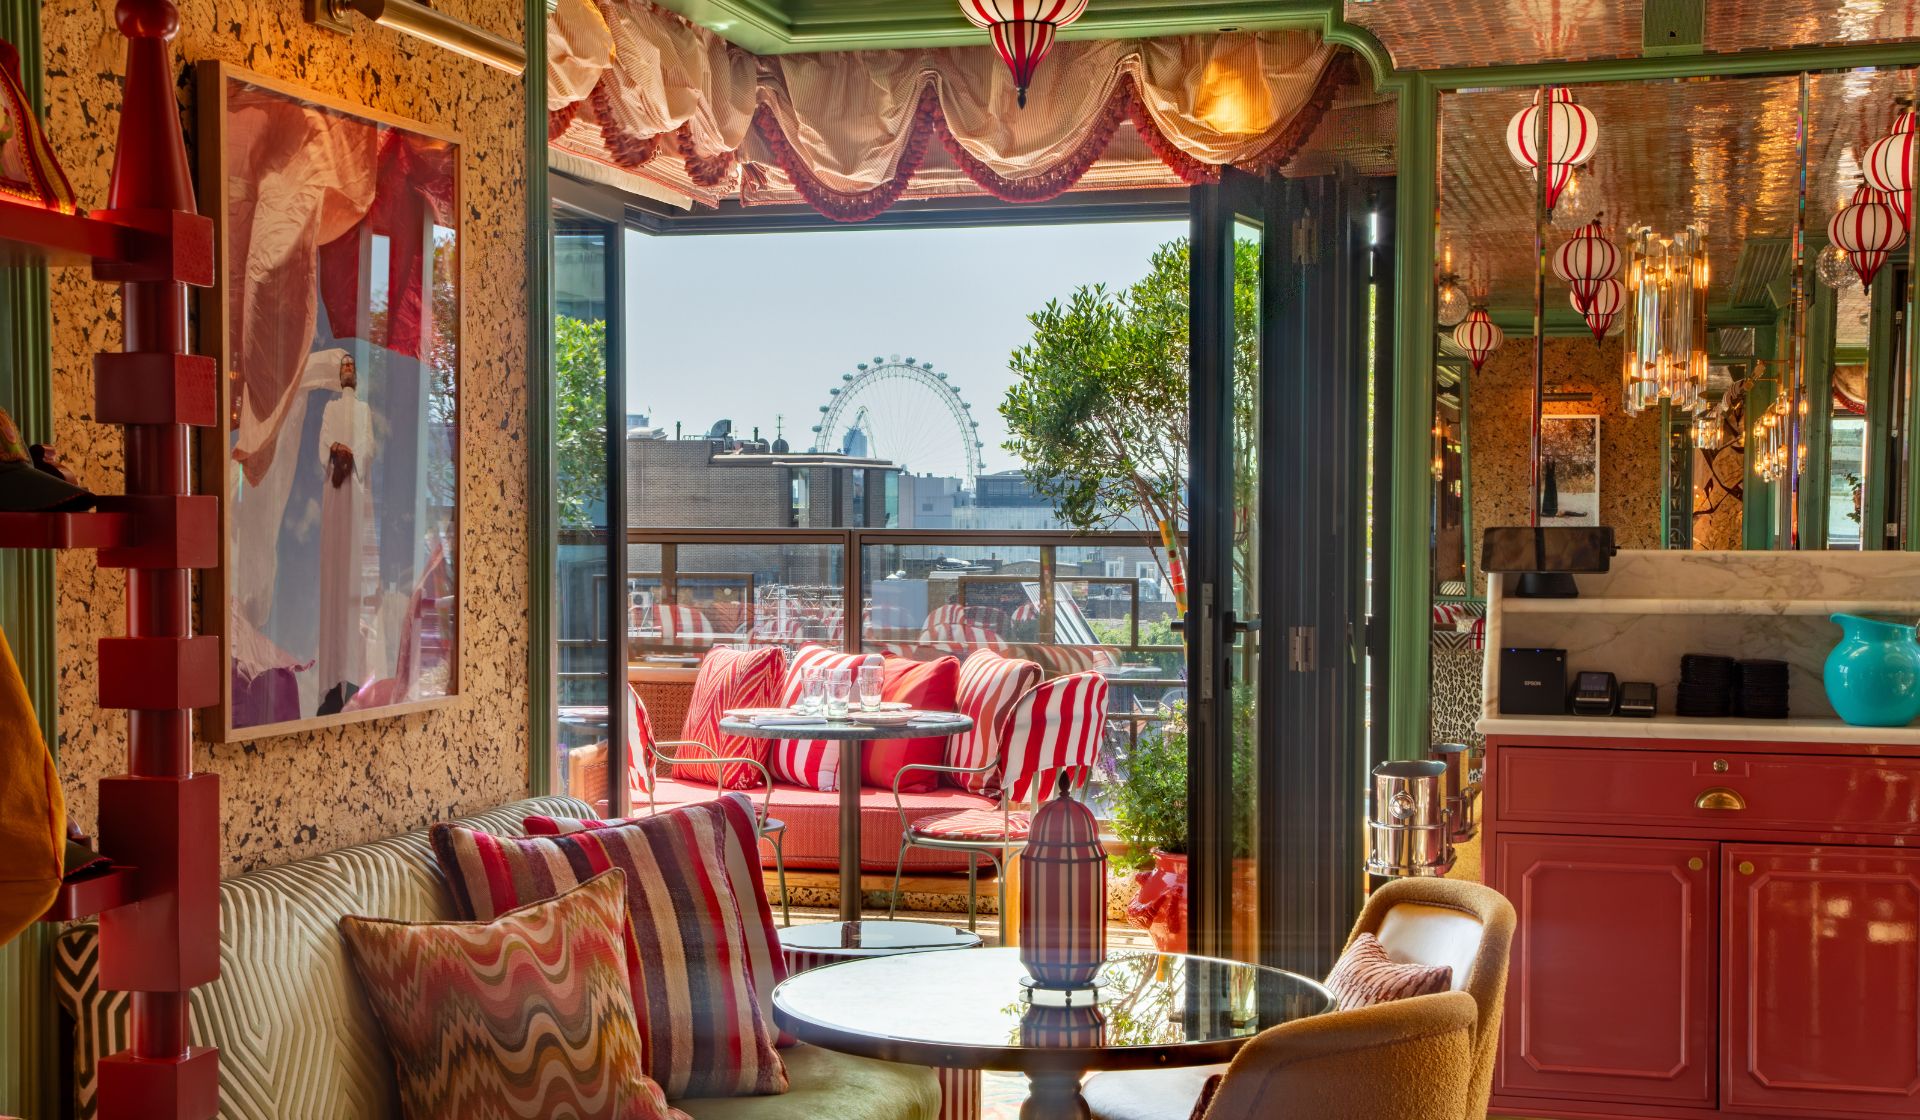
“It’s all about contrast and lighting. If your cabinetry is calm and tonal, a rich or highly textured splashback will naturally draw the eye. Conversely, if your kitchen already has bold colour, a beautifully lit, subtly reflective surface can add balance and sophistication. Layering light really brings out the character of the material. The key is to make it feel intentional, like something that anchors the space.”
– Franky Rousell
The key is to make it feel intentional, like something that anchors the space.”
“Pairing a bold or textured finish with more neutral joinery or benchtops allows the feature to stand out without overwhelming or crowding the space. This can be amplified with lighting – thoughtful placement of ambient lighting, such as under-cabinet LEDs, can enhance the colour and texture, particularly if it has an intricately detailed finish.”
– Katharine Pooley
8. How do you make the splashback work with cabinetry?
“It’s all about balance and cohesion. The splashback should feel like a continuation of the story told by the cabinetry rather than an afterthought. I like to pick up on a tone, texture, or finish that connects the two, perhaps echoing the warmth of timber in a veined stone, or softening a bold cabinet colour with a subtly textured surface. Mirror splashbacks can also be a clever way to make a smaller kitchen feel larger and brighter, reflecting both natural and integrated lighting to open up the space. The aim is for the materials to complement one another so the room feels harmonious and considered, rather than overly coordinated.”
– Jacu Strauss
“The key is balance. If you’re using a patterned or colourful tile, it’s lovely to pull one or two tones from the design and use them on your cabinetry or walls. This creates a cohesive and intentional look without feeling too matchy. Conversely, if your cabinetry is bold or dark, a neutral or textural splashback can provide a soft contrast and keep the overall feel harmonious.”
– Sophie Pringle

“Harmony is everything. If the splashback has strong veining or movement, I’ll pair it with cabinetry in muted, earthy shades like olive, clay, mushroom, or chalky neutrals. These tones anchor the design and let the stone sing. It’s also about finish: I prefer a gentle contrast between a satin-finish stone and a matt or eggshell cabinetry paint, which adds quiet sophistication and subtle depth.”
– Carina Raymond
Choose tones that anchor the design and let the stone sing.
9. How do you tie it into other parts of the kitchen?
“The splashback is a design link between your counter and your cabinetry, so it must work with both. In this project, the splashback was crucial for tying together the dark, textured lower cabinets and the lighter walls. We used a mirrored surface not for its colour, but for its ability to reflect and borrow texture and light from the rest of the room. It ties in the rough, exposed brick wall across the room, which prevents the space from feeling too sleek. The cool tone of the counter then provided a calm visual transition between the dark cabinetry and the dramatic and reflective splashback.”
– Annie Harrison
“A splashback can really set the tone for the entire kitchen palette. With hand-painted or patterned tiles, we often pick out one of the secondary colours to use on the cabinetry or for small accents, like seat cushions, lampshades, or even table linen. It’s those subtle echoes of colour that make a space feel considered and connected.”
– Sophie Pringle
Seat cushions, lampshades, or even table linen can act as subtle echoes to a splashback .
“Neutrals can be a connector for different details in a room, grounding contrasting features together. That being said, I believe texture is a more entertaining way to create ‘flow,’ as pairing complementary finishes or repeating tactile elements can create an engaging yet subtle dialogue across a space.”
– Katharine Pooley
“Repetition and restraint are key. I often echo a tone from the stone in another part of the room; perhaps in a wall colour, a pendant shade, or even the flooring. When walls and cabinetry are painted the same hue, it gives the space a cohesive, enveloping feel. I also love to use a limewash on the walls to add texture and keep the finish from feeling too flat or polished.”
– Carina Raymond
“You can tie your splashback in with simple changes such as lampshades, a fun runner or even a couple of scatter cushions if space allows for soft seating in your kitchen.”
– Laura Stephens
10. What are your tips for picking a splashback that will be easy to maintain and age well?
“Think beyond aesthetics. A splashback is a very tactile part of the kitchen, so consider how it will age, how easy it is to maintain, and how it interacts with light and space. Finishes that are easy to wipe down, particularly behind hobs, make a huge difference day-to-day. The most successful spaces are the ones that grow more interesting over time. Choose materials with natural variation and a bit of honesty to them: perfection tends to look dated far more quickly than character does.”
– Jacu Strauss
11. Finally, what are you currently loving when it comes to splashbacks?
“We love the look of tiles taken all the way to the ceiling. We recently used this approach in an arts and crafts-inspired kitchen, and it added such character, presence, and timeless appeal to the space. It’s a bold move that feels both traditional and contemporary.”
– Sophie Pringle
“I’m drawn to splashbacks that have character but feel timeless. A single slab of marble or stone with natural veining always adds depth, especially when it runs up from the worktop; it feels integrated and sculptural. I also like softly patinated metals, such as brass or copper, which develop a richness over time. Warm integrated cabinet lighting enhances these surfaces beautifully, adding a gentle glow that brings out their texture and tone. There’s something special about materials that evolve with use; they make a kitchen feel lived-in rather than showroom-perfect.”
– Jacu Strauss

Pringle & Pringle Surrey kitchen

I love a zellige with a fun patterned border tile – we are working right now on a kitchen, creating a super fun backsplash this way, which will be a real talking point.
– Laura Stephens
“I’m really drawn to kitchens where the splashback feels like a piece of art, like a single slab of richly veined marble with a natural flow of movement. When it’s paired with warm, tonal joinery and walls in the same shade, it creates this enveloping calm that feels both timeless and modern. It’s a look that doesn’t shout loud, but still makes a strong statement.”
– Carina Raymond
Katharine Pooley Interior Design, CREDIT: Nico Wills
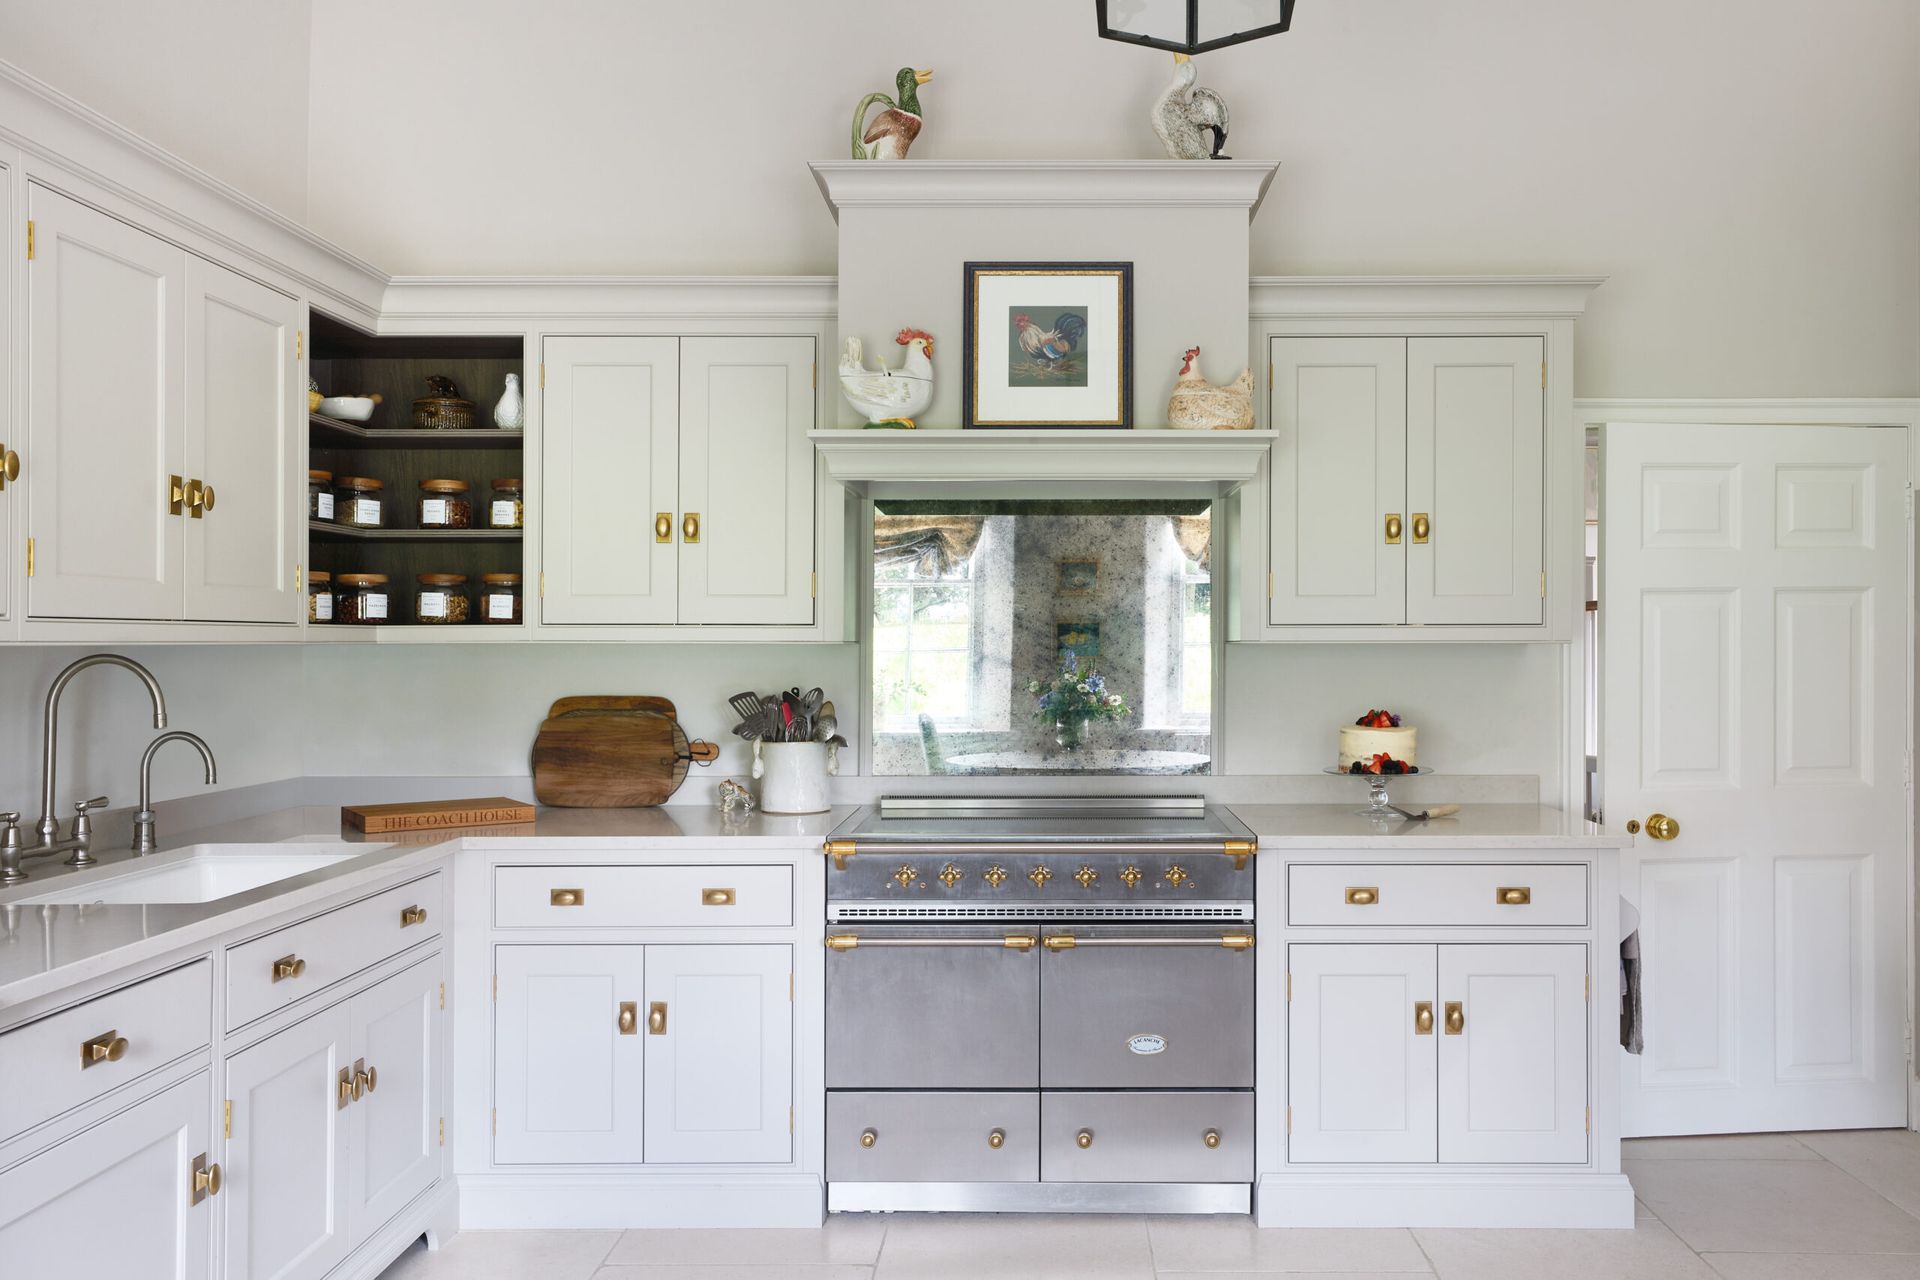
“In my own home, I have a full-height, antique-effect mirror as a splashback, which I absolutely adore. It reflects the light from the generous arched windows found across the room, enhancing the brightness in the space. It is perfectly suited for its countryside location and Georgian ‘coach house’ architecture, bridging the old and new.”
– Katharine Pooley